Annalisa Hultberg, Extension Educator, food safety
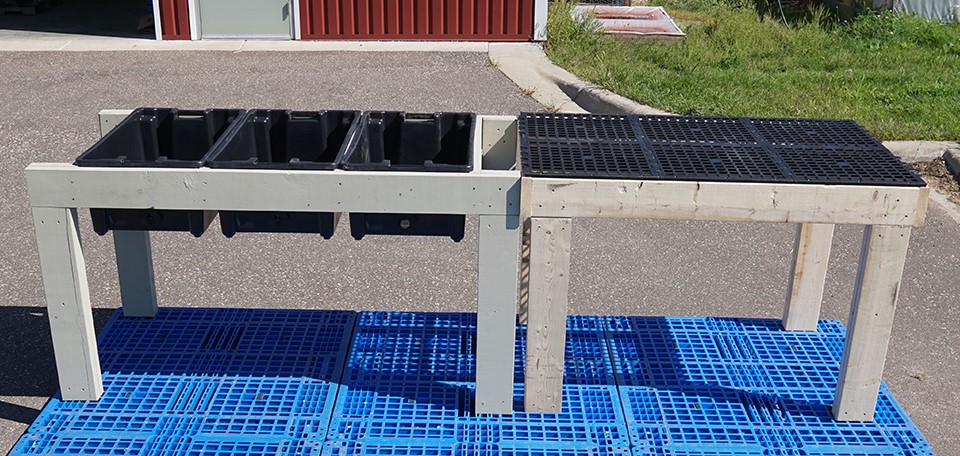
Are you looking for a low-cost, portable and simple way to wash and spray fruits and vegetables in your washing/packing area? This is a construction guide and materials list to build a mobile wash station for washing fruits and vegetables. The station has both a spray table for roots and a stand for wash tubs for washing things like greens.
These are the materials needed to construct 2 flat topped spray tables and 1 tub station. Pricing changes over time, and likely will continue to go up, but this is the estimate for building 2 spray tables and 1 wash tub station. The current total is approximately $388 in materials.
Materials List
Item | Qty | Description and Link | Source | Price | Total | |
Lumber | 14 | 2x6x10' | Menard's | $8.72 | $122.08 | |
Screws | 2 | 1 lb boxes 9x2 1/2 exterior screws for structure | Menard's | $7.78 | $15.56 | |
Paint | 1 | Exterior paint for wooden parts | Ramsey County Product Re-use Center | $0.00 | $0.00 | |
Bench Tops | 6 | A/V Plastic Benchtop 18x36 | Berry Hill Drip Irrigation | $12.39 | $74.34 | |
Screws | 1 | 1 lb box 8x1 1/4 exterior screws for benchtops | Menard's | $7.78 | $7.78 | |
Wash tubs | 3 | 2-bushel produce lugs | Nolt's | $20.00 | $60.00 | |
Drains for tubs | 3 | 1" bulkhead fittings for draining lugs | Zoro | $6.27 | $18.81 | |
Drain Plugs | 1 | 6-pack of Size 6.5 rubber stoppers for lug drains | Amazon | $9.88 | $9.88 | |
Freight | 1 | Shipping | Nolts, Berry Hill and Zoro | $80.00 | $80.00 | |
Building Instructions
Step 1: Cut lumber according to the cut list chart below. (For example - Row 1: 2 Boards cut to give you 2 – 68 inch boards and 2 - 36 inch boards.) Step 2: Assemble legs: Screw one 36" piece to one 30.5" piece, repeat 12 times Step 3: Assemble bench frames: Screw one 36.5" piece into the end of one 52" piece, repeat until you have a rectangle. (See the drawing – Mobile Wash Stand) Step 4: Assemble tub support frame: Measure the width of the tubs below the lip and attach the 4 32" cross pieces to the 68" pieces the same width as the tub Step 5: Attach bench tops: Attach the three bench tops to each bench frame using screws. Step 6: Attach legs: Attach 4 legs to each top with 3-4 screws.
Wood parts list
Cut from the 14 2X6X10’ boards
Qty | Length | Description |
12 | 36" | Long part of leg |
12 | 30.5 | Short part of leg |
4 | 32 | Cross pieces for tub support |
2 | 68 | Long piece for tub support |
6 | 52 | Long piece for bench top |
4 | 36.5 | Short piece for bench top |
Cut List
# of Boards | 1st Cut | 2nd Cut | 3rd Cut |
2 | 68 | 36 | |
2 | 36 | 32 | 32 |
4 | 52 | 30.5 | 30.5 |
2 | 36 | 36 | 36 |
2 | 52 | 36 | 30.5 |
2 | 36.5 | 36.5 | 30.5 |

Comments
Post a Comment